How to Clean and Restore Your Vintage Laserdisc Collection

Vintage laserdiscs require proper cleaning and restoration techniques to preserve both playback quality and collector value. This guide covers everything from basic dust removal to advanced scratch repair — methods that keep discs spinning smoothly for decades. Whether you've just acquired a stack of Criterion releases at the Alameda Flea Market or you're trying to revive a water-damaged collection from a garage sale in Temescal, the steps below will help restore discs to playable condition without causing further harm.
What's the Safest Way to Clean a Laserdisc Without Damaging It?
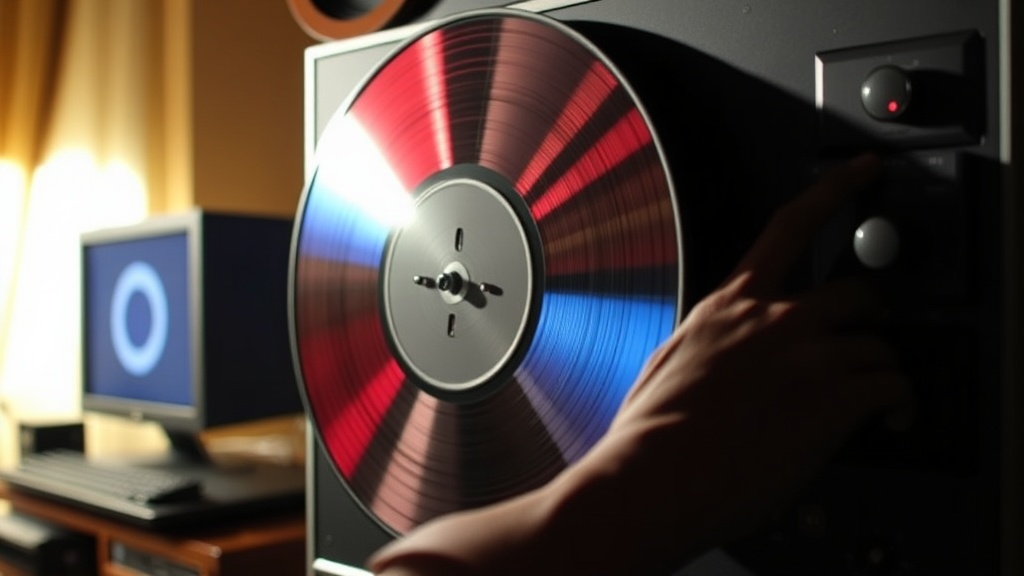
Start with distilled water and a microfiber cloth — that's the safest method for routine cleaning. Laserdiscs aren't like vinyl records; the information sits underneath a thick polycarbonate layer, but scratches on that surface can still scatter the laser beam and cause skipping.
Here's the thing: most "dirty" discs just need a gentle wipe. Hold the disc by the edges (never touch the playing surface) and use a soft, lint-free cloth dampened with distilled water. Wipe from the center hole outward in straight lines — never in circles. Circular motions follow the data spiral and can turn a small smudge into a permanent scratch track.
For tougher grime, a solution of one part isopropyl alcohol (90% or higher) to one part distilled water works well. The alcohol evaporates quickly and won't leave residue. Apply the solution to the cloth first — never directly onto the disc. Excess liquid can seep into the center hub and damage the internal layers.
Some collectors swear by RadioShack lens cleaning kits repurposed for discs, but dedicated solutions like Discwasher D4+ or Brillianize offer better results. Avoid ammonia-based window cleaners — the chemicals can degrade polycarbonate over time.
Tools You'll Need
- Distilled water — tap water contains minerals that leave spots
- 90%+ isopropyl alcohol — for degreasing and disinfecting
- Microfiber cloths — the Kirkland Signature Ultra Plush towels work great
- Canned air — Dust-Off or similar for blowing out center hub debris
- Lint-free cotton gloves — optional but helpful for handling rare discs
How Do You Fix Laserdisc Rot and Discoloration?
You can't reverse laserdisc rot — once the aluminum reflective layer oxidizes, that data is gone forever. The catch? Many discs sold as "rot victims" actually suffer from other fixable problems.
Discoloration often looks worse than it is. Bronze or golden tints along the edges usually indicate adhesive breakdown in the disc sandwich — common in MCA and early Warner Bros. titles from the 1980s. While unsightly, this doesn't always affect playback. White speckling or "snow" during dark scenes? That's actual laser rot, and no cleaning will fix it.
For surface haze or cloudiness, a deeper cleaning sometimes helps. Mix a drop of Dawn dish soap (the original blue formula) with warm distilled water. Gently wipe the disc surface, then rinse thoroughly with more distilled water. Dry immediately with a clean microfiber towel — water spots can etch into polycarbonate if left to evaporate.
The LaserDisc Archive maintains a database of known rot-prone titles. Check your collection against their list before spending hours on restoration. Some pressed runs — particularly early Twilight Zone episodes and certain Japanese import anime — were doomed from the factory.
Can Scratched Laserdiscs Be Professionally Restored?
Professional resurfacing can repair minor to moderate scratches — think of it like polishing a car's clear coat. Services like Disc Go Dev in Los Angeles and Video Game Rescue in Portland use industrial-grade machines that buff out surface damage without thinning the polycarbonate layer excessively.
Here's how professional resurfacing works: the machine sands down the disc surface using progressively finer abrasives, then polishes it to optical clarity. The process removes plastic — usually 1-5 microns — so it can't be repeated indefinitely. A typical laserdisc can withstand 3-5 resurfacing treatments before the data layer becomes too close to the surface.
Cost runs $15-30 per disc, which only makes sense for rare or sentimental titles. That said, many "unplayable" discs just need a good cleaning. Try the manual methods first. If the scratch catches a fingernail, it's too deep for polishing — that's a coaster now.
| Restoration Method | Cost | Best For | Risk Level |
|---|---|---|---|
| Distilled water + microfiber | Under $5 | Dust, fingerprints, light smudges | Minimal |
| Alcohol solution cleaning | $5-10 | Grease, smoke residue, adhesives | Low |
| DIY polishing kits (Novus 1/2/3) | $20-30 | Surface scratches, haze | Moderate |
| Professional resurfacing | $15-30/disc | Deep scratches, valuable titles | Low (done right) |
| Collector replacement | Varies | Laser rot, unplayable damage | None |
How Should You Store Laserdiscs to Prevent Future Damage?
Vertical storage in climate-controlled environments prevents warping and degradation. Store discs upright like books — never stack them horizontally. The weight of multiple discs pressing down can cause the polycarbonate to bow over time, leading to tracking errors during playback.
Temperature matters more than most collectors realize. Keep discs between 65-70°F with 40-50% relative humidity. The Bay Area climate around Oakland actually suits laserdisc storage perfectly — not too humid, not too dry. Avoid attics, garages, and basements where temperature swings cause expansion and contraction. That stress cracks the disc sandwich and invites oxidation.
Original packaging offers the best protection. Those bulky gatefold jackets weren't just marketing — the cardboard buffers discs from impacts and blocks light that degrades plastic. If a jacket is water-damaged or moldy, replace it with a Bags Unlimited archival sleeve. Don't store discs in thin poly sleeves long-term; they trap moisture and can fuse to the disc surface.
"I've seen too many collections ruined by good intentions — collectors who cleaned their discs with Windex and paper towels, then wondered why playback got worse. Gentle and rare beats aggressive and sorry every time." — Freya Abdi, laserdiscs.blog
Storage Environment Checklist
- Store vertically in sturdy shelving — Atlantic Oskar media cabinets work well
- Maintain stable temperature and humidity year-round
- Keep away from direct sunlight and heat sources
- Use silica gel packets in storage boxes for damp climates
- Handle discs by the edges only — fingerprints contain acids that etch polycarbonate
- Return discs to jackets immediately after viewing
What About Mold and Water Damage?
Mold can often be removed if caught early — but water damage to the label side is usually fatal. The reflective aluminum layer sits directly beneath that paper label. Get it wet, and oxidation begins within hours.
For mold on the playing surface: mix one tablespoon of baking soda per cup of distilled water. The mild abrasive lifts fungal growth without scratching. Wipe gently, rinse thoroughly, and dry immediately. Sunlight helps kill remaining spores — 30 minutes of indirect sun won't harm the disc.
Worth noting: some collectors report success using Pledge Multi-Surface cleaner on especially stubborn mold, but this remains controversial in preservation circles. Test on a worthless disc first. The oils in some cleaners can leave a film that attracts dust.
Water-damaged jackets can be saved. Separate the disc immediately and let the cardboard dry slowly — rapid drying causes warping. Place jackets between weighted boards to prevent curling. For valuable Criterion or Pioneer Special Edition packaging, Northeast Document Conservation Center offers professional paper restoration services.
When to Give Up on a Disc
Some damage isn't worth fighting. Separation of the disc sandwich — when you see bubbles or delamination near the center hole — means the disc will fail soon. Severe laser rot with visible pinholes of light shining through? Unplayable. Deep radial scratches that catch a fingernail? The laser can't track through those.
Keep the jacket if it's in good condition. Many collectors buy disc-only replacements and marry them to complete packages. The LDDB (LaserDisc Database) forums have active trading posts for exactly this purpose. Sometimes a pristine disc sits in a ruined jacket, and vice versa — the community exists to matchmake these orphaned pieces.
Steps
- 1
Inspect Your Laserdisc for Damage and Dirt
- 2
Clean the Surface Using Proper Technique
- 3
Store Vertically in a Climate-Controlled Environment